Drawing with light
Drawing with light is a photography method used with low ISO, slow shutter speed lasting upwards of 10 seconds to 32 seconds and a medium aperture. These can be compared to normal paintings if you just imagine the torch as a fountain pen and a camera as the paper. People with a creative mindset will be able to take advantage with this method as they can draw anything as long as they have enough time to do so.
This is a technique where you can draw anything using a flashlight under a certain time limit
I will provide a step by step method on how I will perform this:
This is a technique where you can draw anything using a flashlight under a certain time limit
I will provide a step by step method on how I will perform this:
Step one (the equipment)
The first step is to get your equipment:
A tripod – As mentioned in the first step, it is easy to get the final image blurred because of only slight movements of the camera. Therefor a stabilizer for the camera is necessary, a tripod.
A camera – The camera has to be able to create a long exposure picture. It should have a bigger lens since this is capable of obtaining more light than a smaller lens. The camera should be able to have a cable release attached to it, since the pushing of the start/stop button of the camera can cause movement which means that the quality of the picture would decrease.
A torch – A bright torch used to create the drawing is needed. It should be possible to switch the torch on and off fast, since the time the torch is on and not needed can cause mistakes in the final picture. A torch able to display different colors is not essentially necessary, but if the final light-drawing should look good, it can be added to the list.

Step two (important tips)
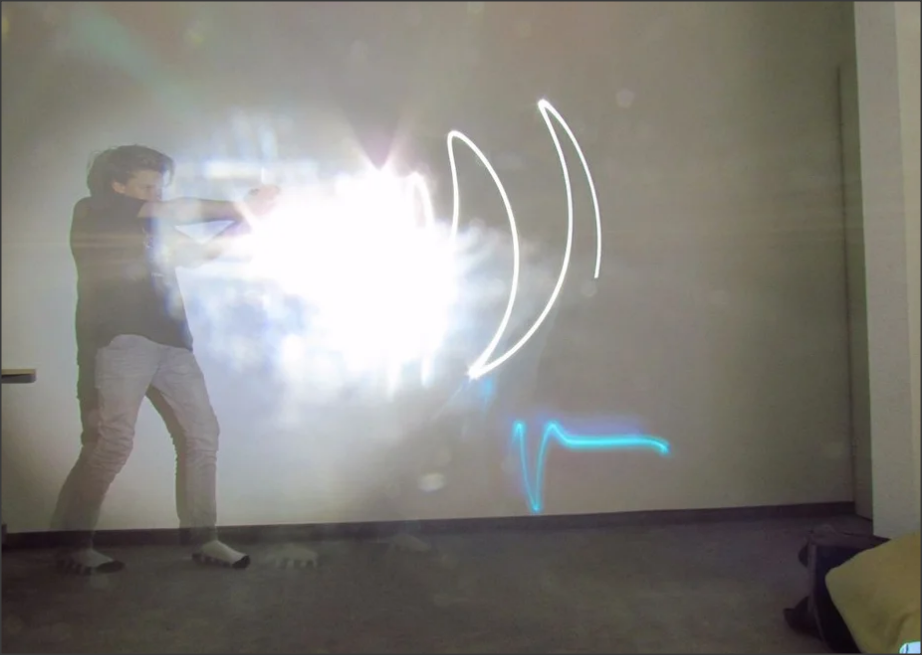
Be sure not to shine the torch directly in the camera during the long exposure since that would bleed out in the picture and mess up the final image. When shining directly into the camera, something like the picture above will come out and that is not how it should look like.
The location of where the image is taken is very important, since there should be no light source around, and no moving objects, etc. It is better not to do it in the city since this is the place with a lot of light sources and moving objects.
What to wear is very important, seriously, since in some pictures one wants to stand out and in others one doesn’t. Therefore the use of black and white t-shirts depending on the scene is important.
Step three (The set)
The set is very important when trying to do things like these. One either has to use a dark room, or wait for it to become night and do the light painting outside, which can look better when you try to use the set in your picture. A big area is necessary since the angle of the camera and the lens is wide.
Using the set in the final picture only functions outside. Not too much of the set should be visible though, since otherwise the contrast between the bright torch and the darkness is destroyed, as one can see in the second image.
Using the set in the final picture only functions outside. Not too much of the set should be visible though, since otherwise the contrast between the bright torch and the darkness is destroyed, as one can see in the second image.


Step four (how to take the pictures)
Place your camera on the tripod or on any stable place, about 3-4 meters away from where you want to stand. (The distance can also be longer, depending on the size of the area).
Make sure to set the camera mode to 'manual' (M), and adjust the camera's shutter speed to 20-30 seconds depending on how much time one needs.
Because of the time one needs to get in place, set a timer or ask another person to press to start.
Make sure to have no other lights unless you want it.
You should have something like this:


Pictures related to 'Drawing with Light'


Credit
The information I've obtained is from this site below:
https://www.instructables.com/id/Drawing-with-Light-1/
https://www.instructables.com/id/Drawing-with-Light-1/
Photoshoot one plan

My drawing with light images


As you can see here, I've attempted to draw a star and a fish using drawing with light, the fish was successful, however the star was missing the other side.


